How to Restring a Mandolin
If you play the mandolin, you know how important it is to keep your instrument in good condition. One essential maintenance task is changing the strings. With a bit of practice, changing mandolin strings can be a quick and easy process. In this lesson, we'll show you how to restring your mandolin in just a few simple steps.

Preparation
Before you begin to replace the strings on your mandolin, you need to prepare a few things.
Gather the tools
You will need:
- A new set of 8 mandolin strings
- Wire cutters
- A string winder (optional)
- A mandolin tuner (optional)
- A soft cloth for cleansing
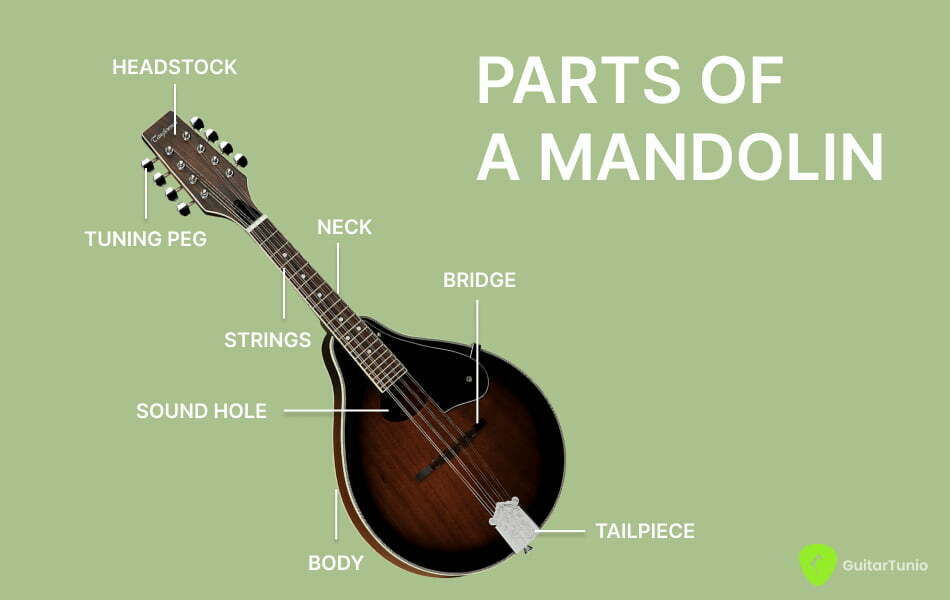
Get to know your mandolin
To change the strings on your mandolin, you’ll need to get acquainted with the parts of the instruments, and how they work. This will help you get through the steps of replacing your strings without confusion.

How to change mandolin strings
Once you have everything you need, lay your mandolin face up on a flat surface and let’s begin.
Step 1: Remove the old strings
Start by removing the old strings from your mandolin. Do it one by one. Turn the tuning peg to loosen the tension on the string until the string becomes slack enough to be removed from the tuning pegs, tailpiece, and bridge. You can rotate the tuning peg with your hand or use a string winder to make this process faster.
Step 2: Clean the mandolin
While you have the old strings off, it's a good idea to take the opportunity to clean your mandolin. Use a soft, lint-free cloth to wipe down the body and neck of the instrument, and get off any dust or debris that may have accumulated.
Step 3: Insert the new strings
Take your new set of mandolin strings and insert the ball ends of the strings into the tailpiece. Then, guide the strings up to the bridge and insert them through the holes in the bridge.
Step 4: Anchor the strings
Once you have inserted the strings through the holes in the bridge, you will need to anchor them. Some mandolins have a small metal plate on the underside of the bridge that holds the strings in place. If your mandolin doesn't have a metal plate, you can tie a small knot at the end of each string to keep it from slipping through the bridge.
Step 5: Attach the strings to the tuning pegs
Now that the strings are anchored at the tailpiece and bridge, you can begin attaching them to the tuning pegs. Start by inserting the end of each string through the appropriate hole in the tuning peg. Then, begin winding the string onto the peg in a clockwise direction.
Step 6: Tune the strings
Once all the strings are attached to the tuning pegs, begin tightening them. Tune each string in turn by turning the tuning peg until the string is at the correct pitch. You can use a mandolin tuner or tune it by ear if you’re experienced. We provide a mandolin tuner app for Android and iOS smartphones, you can check out our stores to learn more about it.

Step 7: Stretch and retune the strings:
After you've tuned each string, gently stretch them by pulling them away from the fingerboard. This will help to settle the strings in place and make them less likely to go out of tune. Then, retune the strings, repeating the process until the strings stay in tune.
That's it! Restringing your mandolin should be an easy and quick task with practice. Just remember to take your time, and make sure that each string is winding neatly and evenly onto the tuning pegs. By following these steps, you can keep your mandolin sounding great and playing well for years to come.


